1 前言
通过这篇文章,你将获得以下方案:
- 使用Git与GitHub备份全站
- 使用GitHub Actions自动部署全站
- 使用自定义域名
2 使用Git与GitHub备份全站
2.1 初始化Git
在GitHub上创建一个新的private仓库,仓库名为 blogName 。
请务必设置为private仓库,否则你的配置文件中的私密信息将会被公开。
在你的站点目录下执行以下命令:
1
2
3
4
5
| git init
git remote add origin <your-repo-url>
git add .
git commit -m "init"
git push -u origin master
|
2.2 配置.gitignore
在你的站点目录下创建 .gitignore 文件,内容如下:
这可以防止你的 public 目录被提交到仓库中。
3 使用GitHub Actions自动部署全站
3.1 创建GitHub Actions
在你的站点目录下创建 .github/workflows/gh-pages.yml 文件,内容如下:
点击查看配置文件
 1
 2
 3
 4
 5
 6
 7
 8
 9
10
11
12
13
14
15
16
17
18
19
20
21
22
23
24
25
26
27
28
29
30
31
32
33
34
35
36
37
38
39
40
41
42
43
44
45
46
47
48
49
50
51
52
53
54
55
56
57
58
59
60
61
62
63
64
65
66
67
68
69
70
71
72
73
74
75
| # Sample workflow for building and deploying a Hugo site to GitHub Pages
name: Deploy Hugo site to Pages
on:
# Runs on pushes targeting the default branch
push:
branches: ["main"]
# Sets permissions of the GITHUB_TOKEN to allow deployment to GitHub Pages
permissions:
contents: read
pages: write
id-token: write
# Environment variables available to all jobs and steps in this workflow
env:
HUGO_ENV: production
HUGO_VERSION: "0.115.4"
GO_VERSION: "1.20.5"
NODE_VERSION: "18.15.0"
TINA_CLIENT_ID: ${{ vars.TINA_CLIENT_ID }}
TINA_TOKEN: ${{ vars.TINA_TOKEN }}
jobs:
# Build job
build:
runs-on: ubuntu-latest
steps:
- uses: actions/checkout@v3
- name: Set up Node.js
uses: actions/setup-node@v3
with:
node-version: ${{ env.NODE_VERSION }}
- name: Install Hugo
run: |
curl -LO "https://github.com/gohugoio/hugo/releases/download/v${{ env.HUGO_VERSION }}/hugo_extended_${{ env.HUGO_VERSION }}_Linux-64bit.tar.gz"
tar -xvf hugo_extended_${{ env.HUGO_VERSION }}_Linux-64bit.tar.gz
sudo mv hugo /usr/local/bin/
rm hugo_extended_${{ env.HUGO_VERSION }}_Linux-64bit.tar.gz
hugo version
- name: Install Go
run: |
curl -LO "https://dl.google.com/go/go${{ env.GO_VERSION }}.linux-amd64.tar.gz"
sudo tar -C /usr/local -xzf go${{ env.GO_VERSION }}.linux-amd64.tar.gz
echo "export PATH=$PATH:/usr/local/go/bin" >> $GITHUB_ENV
rm go${{ env.GO_VERSION }}.linux-amd64.tar.gz
go version
- name: Setup Project
run: npm run project-setup
- name: Install npm dependencies
run: npm install
- name: Build Website
run: npm run build
- name: Upload artifact
uses: actions/upload-pages-artifact@v1
with:
path: ./public
- name: Echo CNAME
run: echo ${{ secrets.CNAME }} > ./public/CNAME
- name: Deploy Web
uses: peaceiris/actions-gh-pages@v3
with:
PERSONAL_TOKEN: ${{ secrets.PERSONAL_TOKEN }}
EXTERNAL_REPOSITORY: ${{ secrets.PAGE_URL }}
PUBLISH_BRANCH: master
PUBLISH_DIR: ./public
commit_message: ${{ github.event.head_commit.message }}
|
仔细观察代码,你会发现有一些变量需要你自己填写。
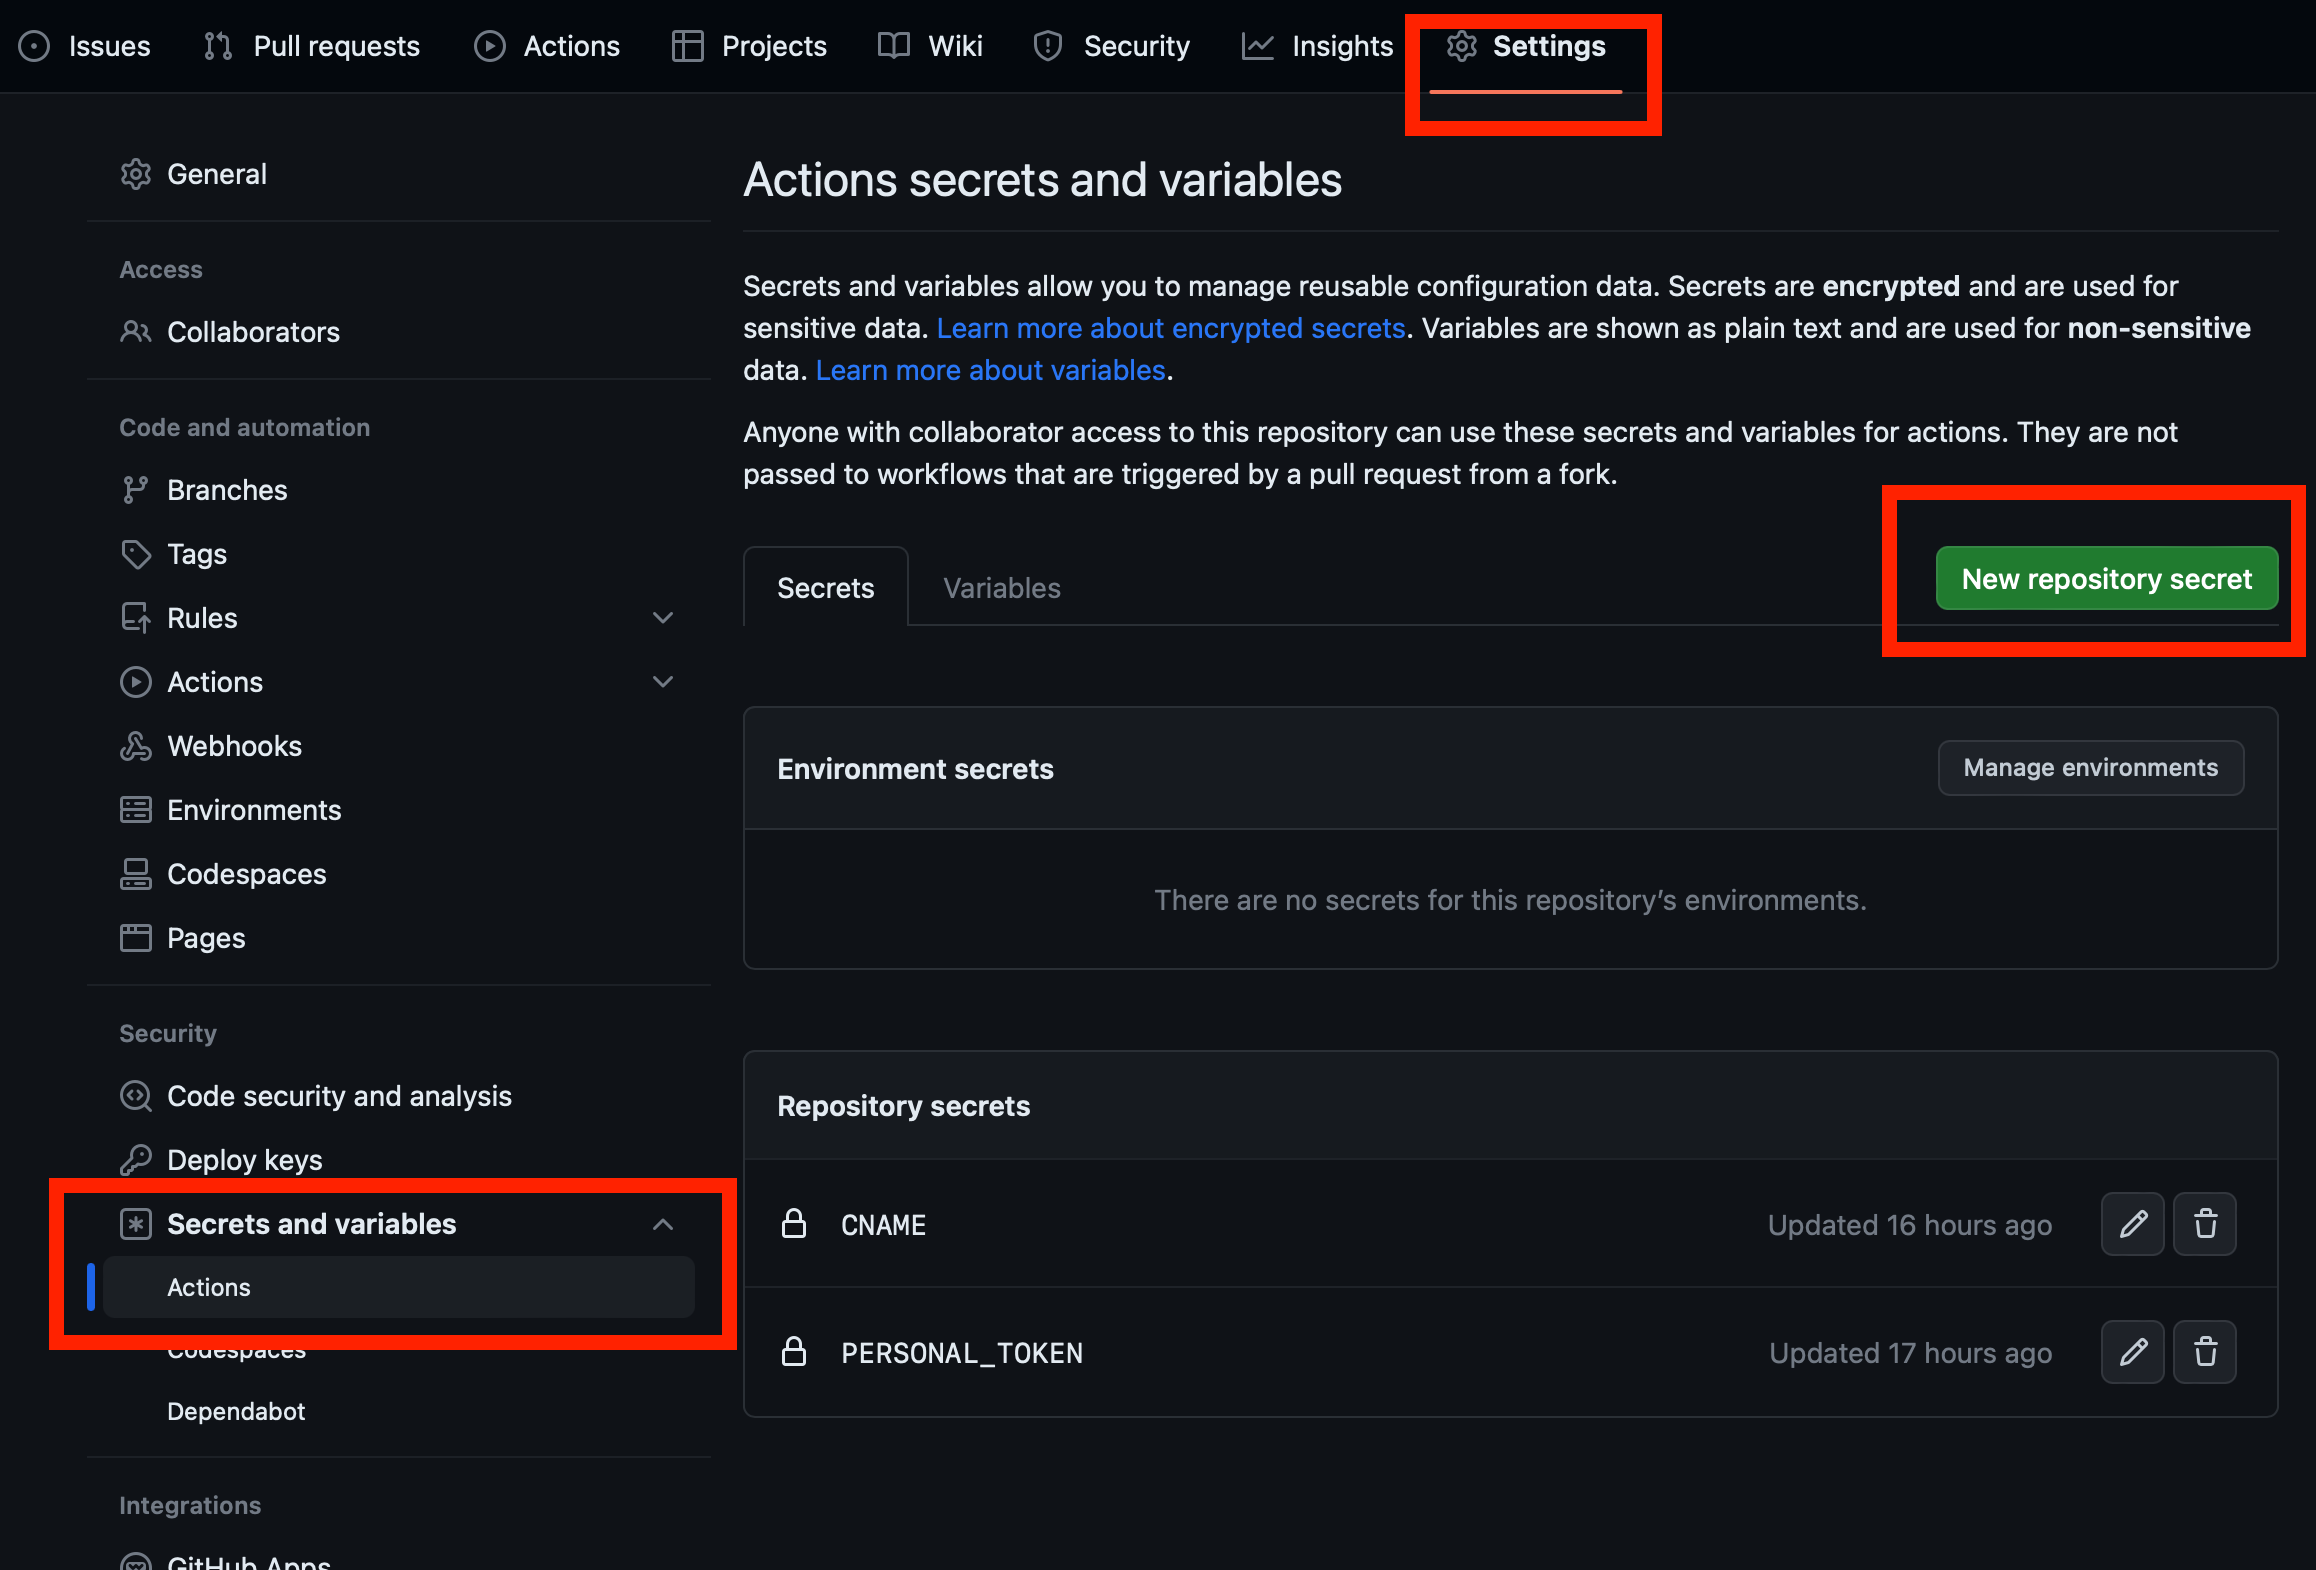
3.2 配置GitHub Secrets
在你的仓库中,点击 Settings -> Secrets -> New repository secret ,添加以下变量:
PERSONAL_TOKEN
这是你的GitHub Personal Token,用于推送到仓库中。
点击这里获得你的Token。PAGE_URL
这是你的GitHub Pages仓库的URL,格式应该为 username.github.io 。CNAME(可选)
这是你的自定义域名,格式应该为 example.com 。
点击查看示例
3.3 部署博客
观察GitHub Actions的配置文件,你会发现,只有在main分支提交时,才会触发自动部署。
1
2
3
4
5
6
7
| # Sample workflow for building and deploying a Hugo site to GitHub Pages
name: Deploy Hugo site to Pages
on:
# Runs on pushes targeting the default branch
push:
branches: ["main"]
|
因此,我们需要将静态文件推送到main分支中就能完成部署。
1
2
3
| git add .
git commit -m "init"
git push origin main
|
或者在GitHub网页中编辑完文章后,点击Commit changes按钮。
这样,你应该就能在username.github.io中看到你的博客了。
4 (可选)使用自定义域名
如果你想要绑定域名,可以在 GitHub Pages 的设置中,将 Custom domain 设置为你的域名。
此外,你还需要在你的域名服务商中,添加一条 CNAME 记录,将 yourCustom.domain 指向你的博客域名username.github.io。
有时,你或许需要在你的域名服务商中,添加一条 A 记录,将 yourCustom.domain 指向 GitHub对应的IP地址。
这样你就可以通过yourCustom.domain访问你的博客了。
5 结语
至此,你的博客就已经可以自动部署了。
下一篇文章中,我将分享我将博客文章图片托管至OSS的方案。
